Looks aren’t everything — but when it comes to your resume, appearances do matter. A good resume shouldn’t just be impressive to read, it should also be nice to look at, which means hitting a good balance of content and white space. If this sounds shallow, it isn’t — formatting, headings, and design can all massively impact readability, which means something as simple as margins can make or break your resume.
The right size for resume margins
Resume margins should be one inch on all sides. This rule applies to your left, right, top, and bottom margins. If you need slightly more space on your resume, you can reduce your margins to around 0.5 inches (half an inch). Don't go any lower than 0.5 inches — it'll make your resume too hard to read.
Pro Tip: One inch margins are the default on most programs. If you're using Microsoft Word or Google Docs, there's no need to mess with the margins — just leave them as they are!
Why resume margin size matters
Margins that are too small (less than half an inch) result in a cluttered resume, making it hard for recruiters to skim. On the other hand, margins bigger than one inch can give your resume an empty feeling and lead hiring managers to conclude that you don’t have much to say. Either way, it’s not a great first impression — and it could mean the difference between staying in contention or being discarded immediately.
Getting your resume margins right means that:
- Your resume is easier to read
- Important information stands out at a glance
- It looks polished and professional
- Applicant Tracking Systems (ATS) can process your resume correctly
Pro Tip: The best way to get your resume past ATS is to keep it simple — that means no fancy formatting! Check out our guide on how to beat ATS for more tips.
How to set your resume margins
If you're writing your first ever resume — or if you just want to keep it simple — take the easy route by using one of the free resume templates. These all come pre-formatted and are optimized for ATS, including proper resume margins.
Pro Tip: If you’re not sure if you’ve used the right margins for your resume, upload it to the tool below — it’ll let you know if your resume is formatted correctly with the right margins. It’ll also score your resume on key criteria such as resume length, spacing, and font size and style.
In Microsoft Word
To set your resume margins in Word:
- Select Layout or Page Layout at the top of the screen.
- Click on Margins.
- Set your margins to Normal — this is pre-set to one inch.
- If you want to choose a different size, click Custom Margins to set your own.

In Google Docs
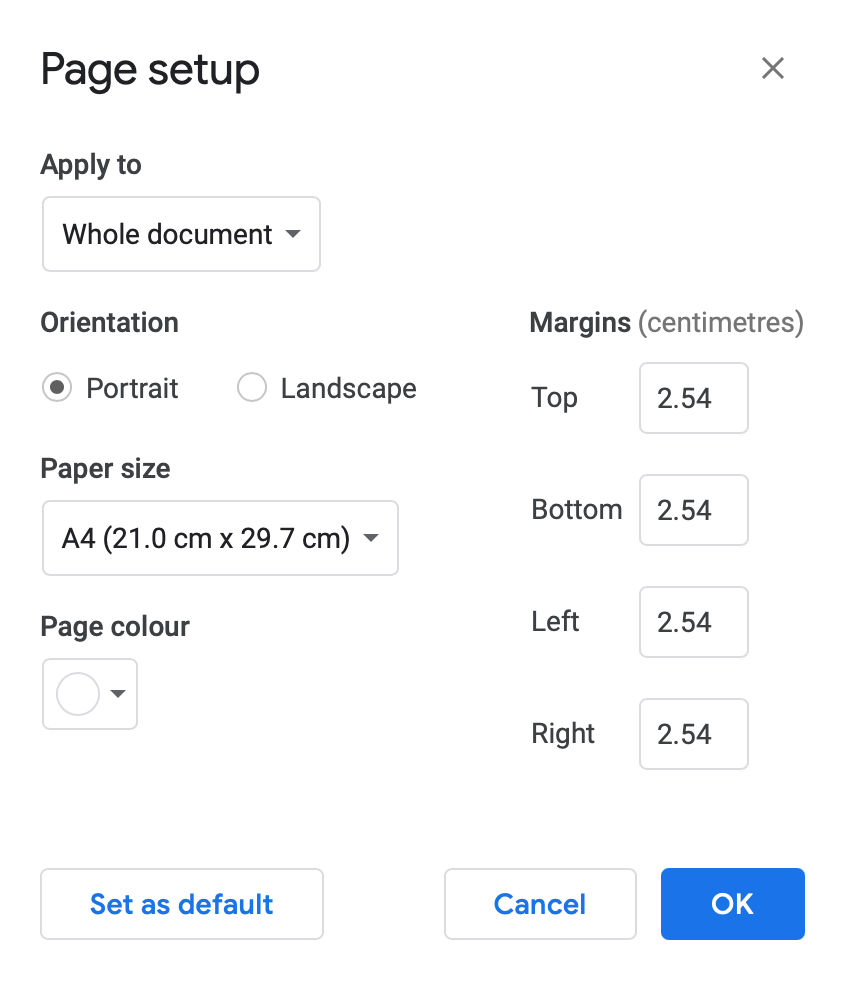
The default margins in Google Docs are set to one inch, so you probably won’t have to change them. If you do:
- Click File.
- Choose Page setup.
- Go to Margins.
- Set your preferred margins in the relevant text boxes.
- Click OK to set margins for this document only or Set As Default for all future documents.
- Or click and drag side margins by locating the ruler at the top of the document and moving the upside down triangle.
In OpenOffice or LibreOffice
If you use OpenOffice or LibreOffice:
- Select Format from the drop-down menu at the top of the screen.
- Click on the Page option.
- Set your preferred margins in the relevant text boxes.
- Click OK.
How to format resume margins for print
Just because your resume looks good on a screen doesn't mean it'll look good on paper. Here's how to format a printed resume:
- Set your resume margins to standard (1 inch) to avoid cutting off text.
- Select a print-ready font. While sans serif fonts like Arial and Verdana tend to look better on a screen, serif fonts like Garamond or Times New Roman work better for printed text.
- Check your paper size. Standard paper size is 8.5 by 11 inches (US Letter) in the US and Canada, or A4 in most other countries.
- Use good quality white or ivory paper.
- Before committing, use the "print preview" function to make sure your formatting is intact.
Pro Tip: When you're done, always save your resume as a PDF! This preserves your formatting and ensures that your margins will look the same to a hiring manager as they do to you. If you've used small margins, make sure that no information is cut off from your resume when you generate the PDF.
Other resume formatting tips
Getting the margins right isn't the only key to a professional-looking resume. Here are some of the best resume formatting tips from hiring managers:
- The standard resume length for most job seekers is one page. It’s good to stick to this if you can, but it’s better to send in a two-page resume than one with quarter-inch margins and size 9 text.
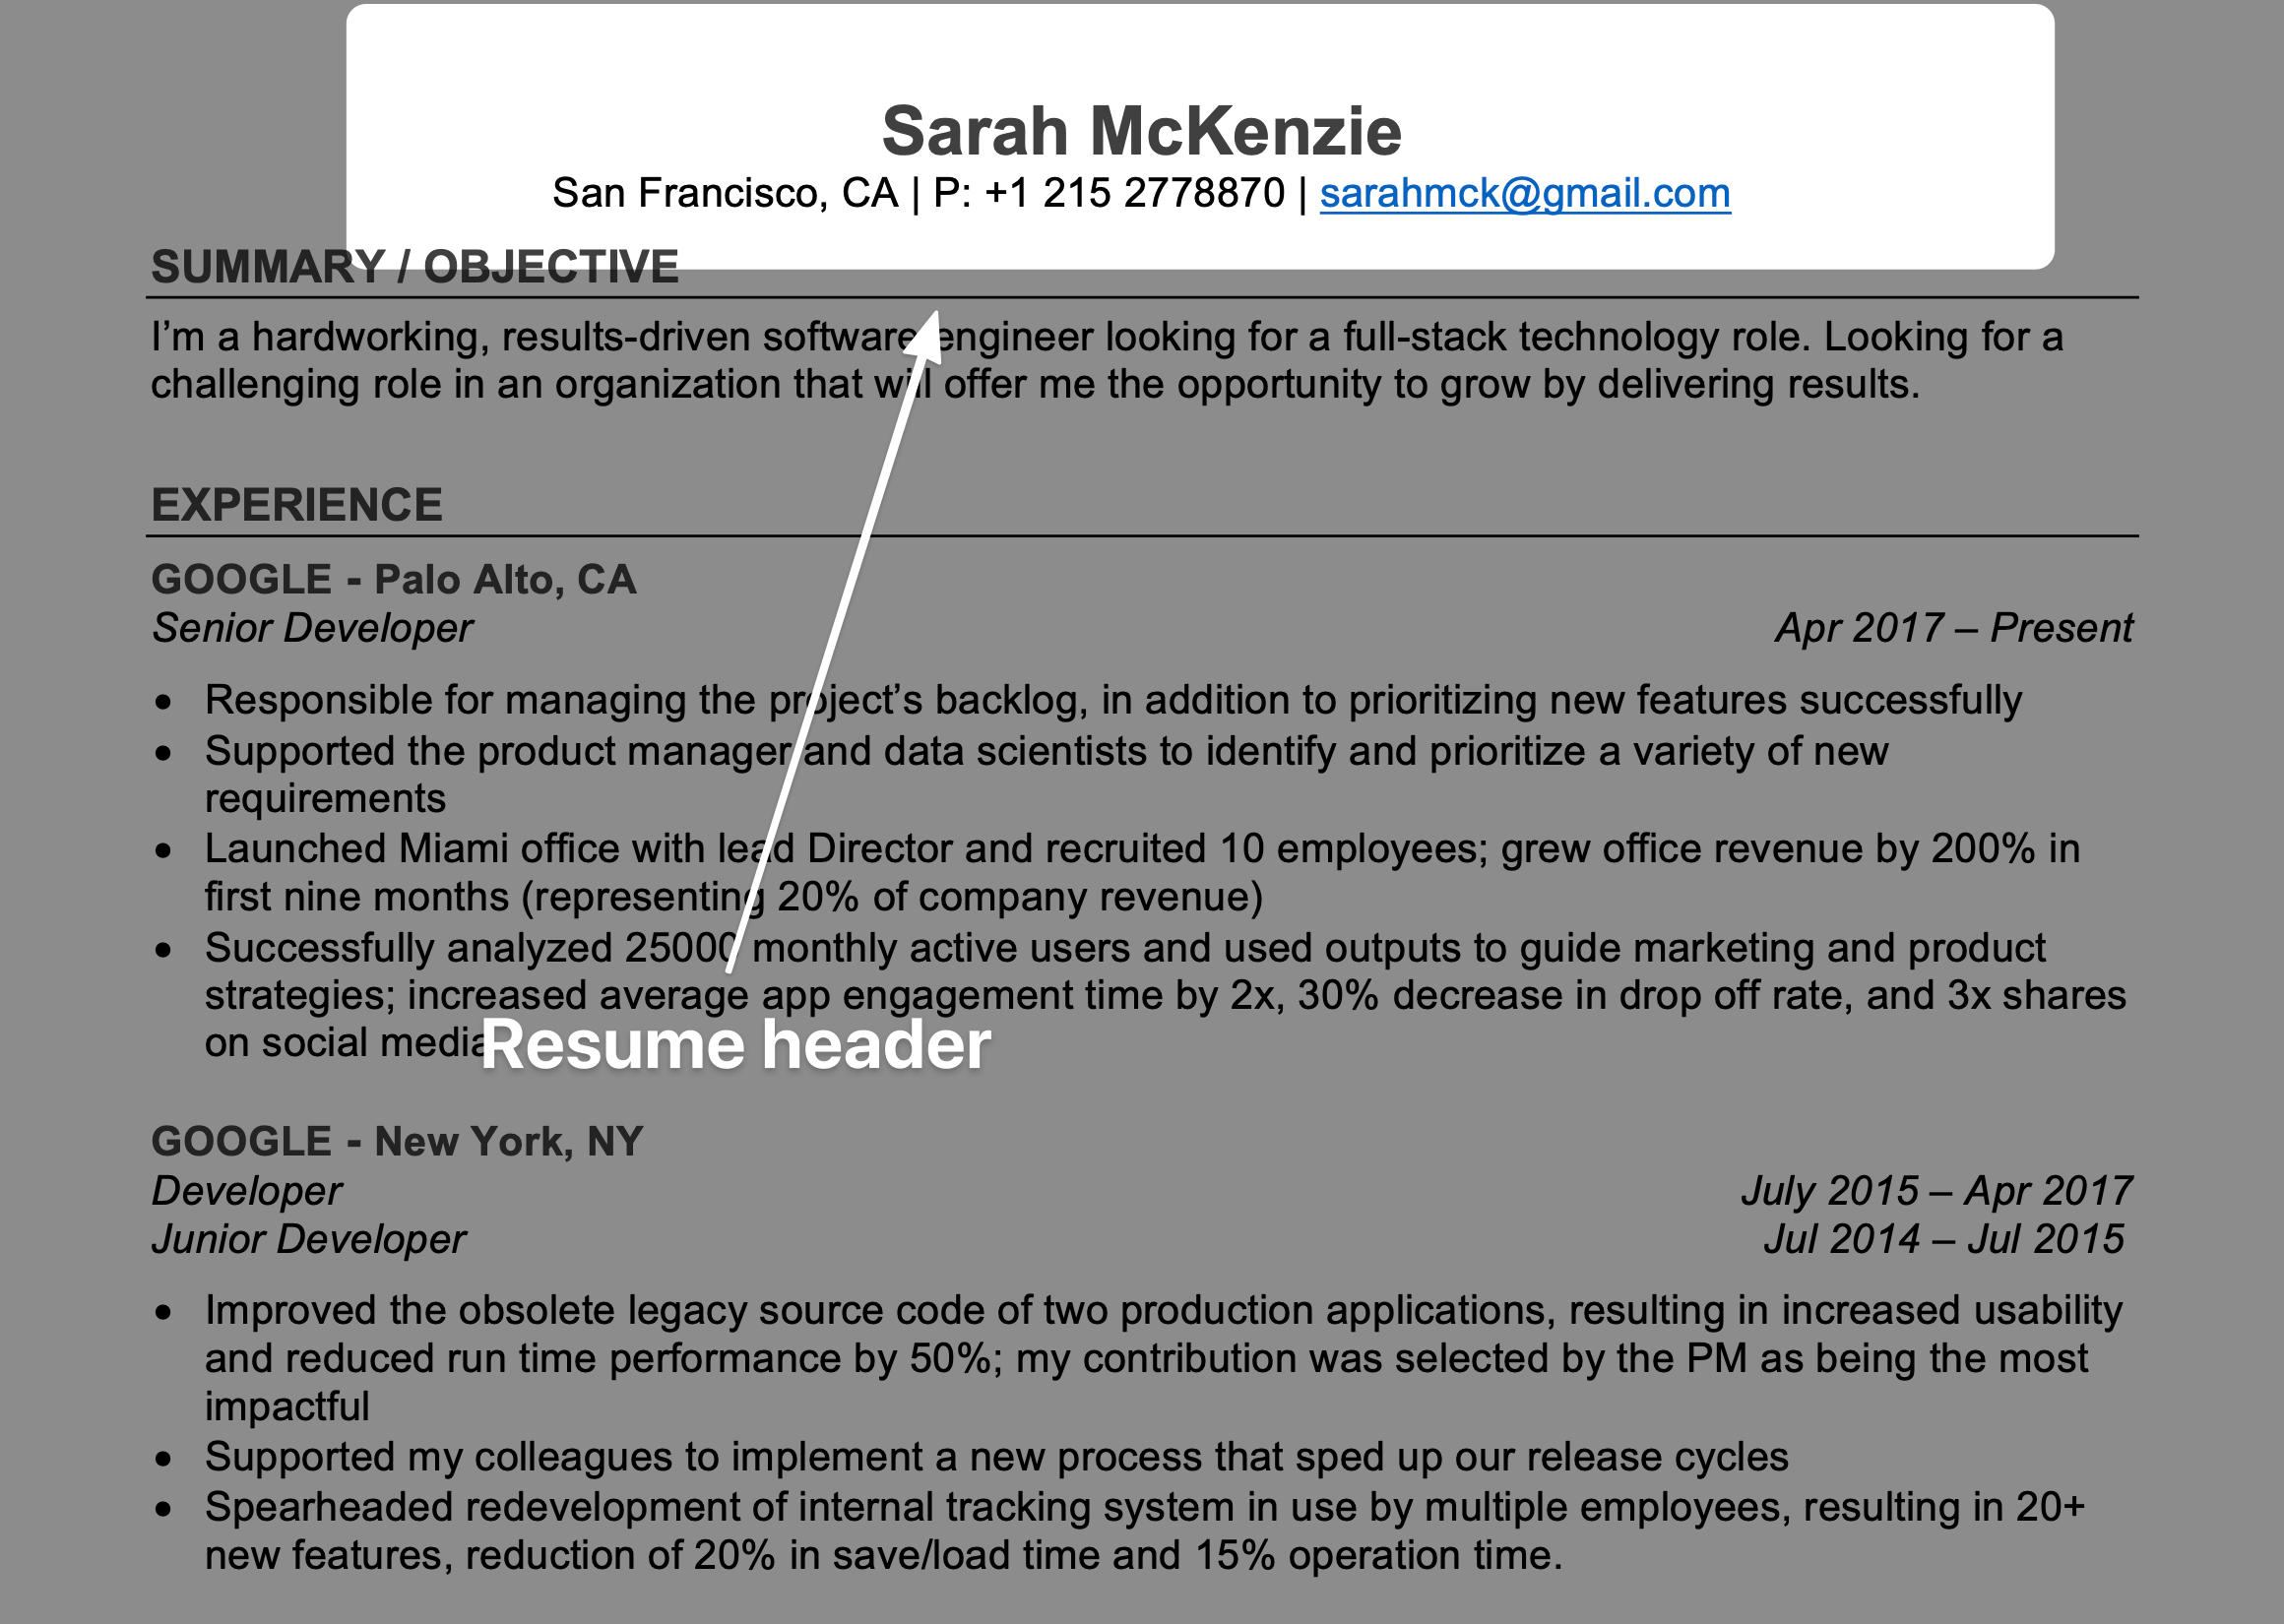
- Keep your text aligned to the left — don't center it! This looks more natural and keeps the focus on the most important parts of your resume, like headers pointing to your work experience, skills, and education.
- When it comes to line spacing, 1 or 1.15 point spacing for normal text and double spacing for headings and subheadings is a good rule of thumb. This isn't a hard and fast rule, but make sure there’s enough white space and your resume is easily readable.
- The best resume fonts are clear and readable. If in doubt, stick to a standard font like Arial, Calibri, or Georgia.
- Just like you shouldn't go too small with your resume margins, don't mess around with your font size. 10, 11, or 12 point text is ideal, depending on what font you choose.
- Avoid special characters — ATS find them hard to read, which means your resume may come out as gibberish. The same rule applies to images and other "creative" formatting.
- Adding a horizontal line in Word is an acceptable way of separating different sections of your resume. If you're not sure how to correctly format lines on your resume, simply add an extra space between sections instead.
- Whatever format you choose — font, size, spacing — use the same formatting throughout your entire resume. When it comes to margins, your left and right margins should be identical, and so should your top and bottom margins. For example, if you choose your left margin to be 0.5in, then also set your right margin as the same (0.5in).
Pro Tip: For even more help with resume formatting, including the perfect font choice, check out our guide on what font to use on your resume and other tips.
A note about creative resumes
Creative resume formats might look fancy, but they’re unnecessary. The vast majority of hiring managers prefer a standard resume format — even those hiring for creative positions.
Even more reason to keep your resume simple? Not only are fancy resumes hard for recruiters to read, they’re even harder for ATS. Machines have a tougher time reading things than people do, so avoid anything that’s likely to confuse them, like images and downloaded fonts.
If you're worried about ATS, use the tool below to find skills and keywords relevant to the job you’re applying for. It’s a good way to improve your chances of getting past ATS screeners.
Pro Tip: Using a free ATS resume scanner can take the guesswork out of applying for jobs. Simply upload your resume and let our AI-powered software do the rest!
Resume margin FAQs
What margins should a resume have on A4 paper?
The same rule applies in metric: 2.54 cm (1 inch) on all sides, and never below 1.27 cm (0.5 inches). A4 paper is slightly narrower and taller than US Letter, so a resume formatted for one size can shift when opened in the other — set your page size to match wherever you're applying (A4 in most countries, Letter in the US and Canada) before you fine-tune margins.
What size should a resume be?
One page for most job seekers, on standard paper size: 8.5 x 11 inches (US Letter) in the US and Canada, A4 (21 x 29.7 cm) almost everywhere else. If you're tempted to shrink margins to squeeze everything onto one page, cut content instead — a cramped page reads worse than a well-spaced one.
Should resume margins be the same on all sides?
Keep them symmetrical — matching left/right and top/bottom margins is what makes a page look deliberate rather than squeezed. If you need extra room, reduce the side margins to around 0.75 inches first and leave the top and bottom at 1 inch; text lines that run edge to edge are harder to skim than a slightly longer page.